
Brothers and sisters, I finally couldn't resist and got my hands on Claude Code !
Recently, desktop Agents and personal AI assistants have been extremely popular, such as OpenClaw(formerly Clawdbot), the open-source AI assistant;Moltbook, a social platform for AI agents. No matter how popular the others are, Claude Code remains the most stable.
Claude Code is now not only an AI assistant for developers and technical personnel, but also a general-purpose AI assistant with high personal popularity that ordinary users can use.
I'm not a professional technical person, just a complete beginner. If I can do it, after reading this article, I believe you can too.
This tutorial is based on a Windows computer. If you're also using one, then follow along and let's get started~~
The overall approach is divided into four steps:Install the environment and tools needed for Claude Code → Install Claude Code → Configure the large model → Start using Claude Code
01. Install the Environment
The first step is to installNode.js. If it's already installed, you can skip this.
Open the download address:
https://nodejs.org/en/download
Select the corresponding computer system (mine is Windows)
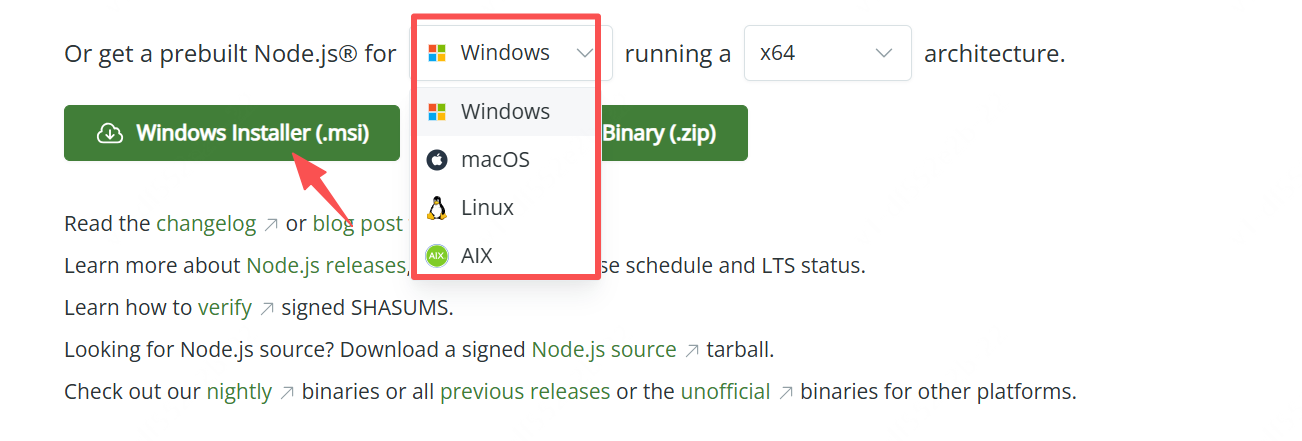
Find the folder, double-click to open the installer
Start clicking Next, Next... just follow the installation instructions.
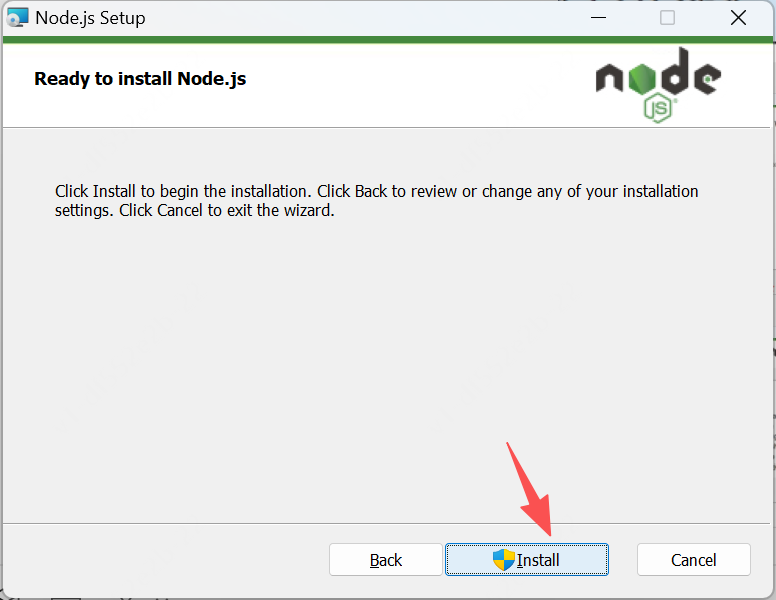
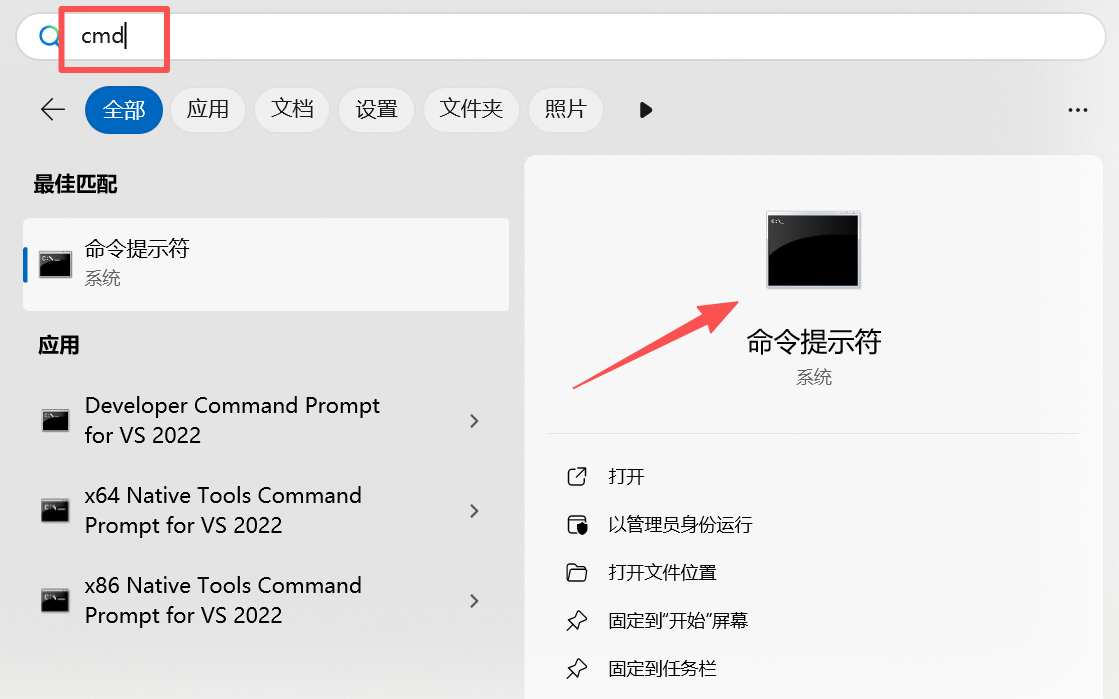
After the installation is complete, open thecommand-line interface, and we'll verify whether Node.js was installed successfully.
In the search box on your computer, type:cmd
On Windows it's calledCommand Prompt, on Mac it should be called Terminal.
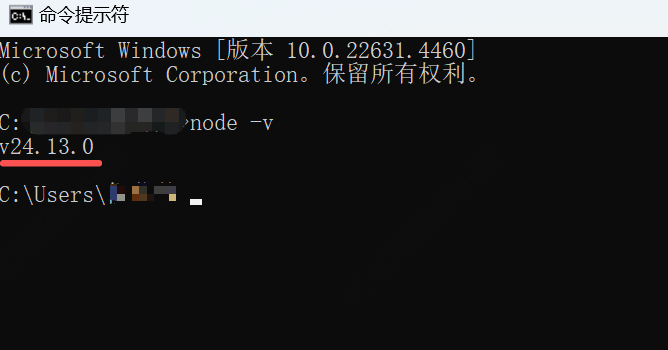
Then enter the following command. If the version number is displayed, it proves the installation was successful.
node -v
Let's also install the Git tool.
Download address:https://git-scm.com/install/windows
Also select the corresponding computer system to download.
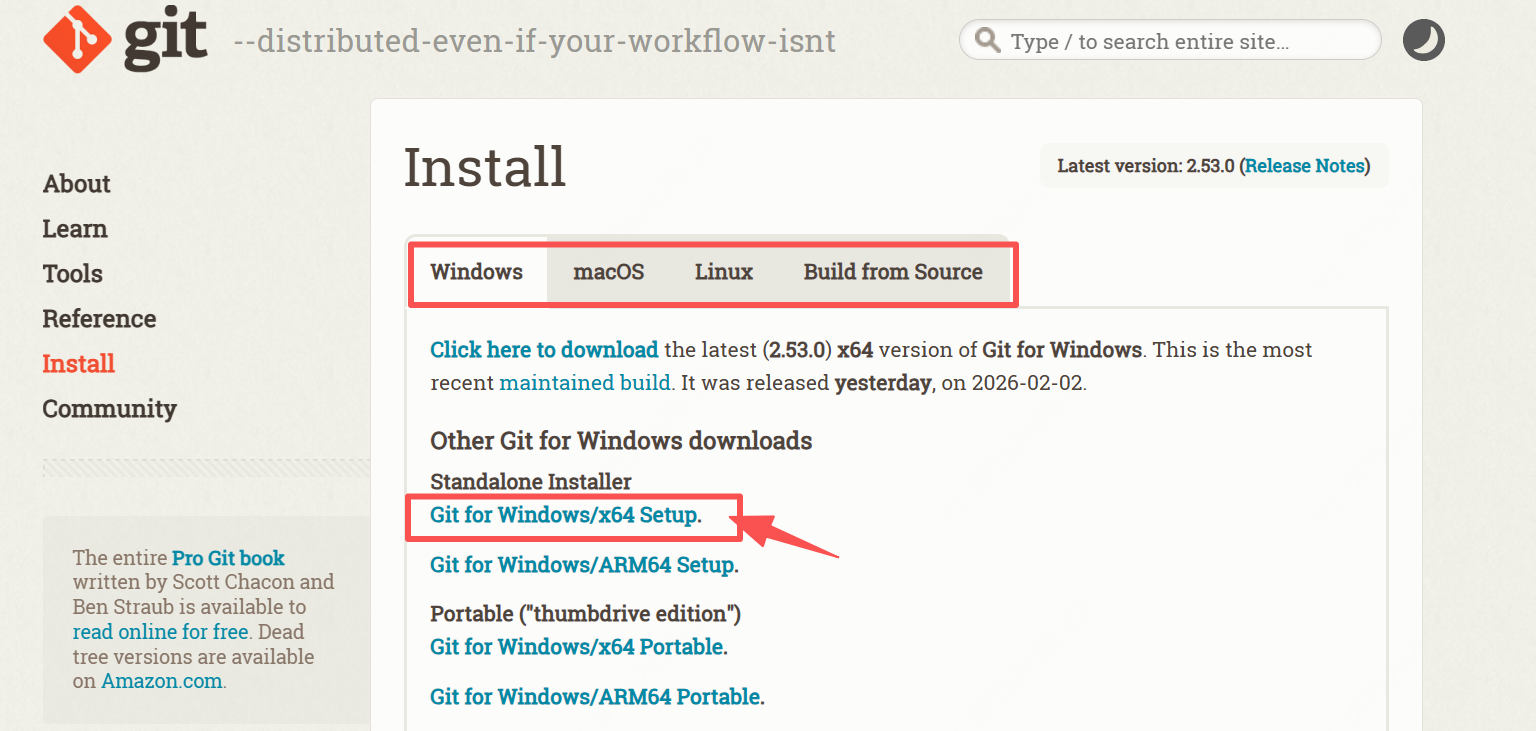
Find the application in the folder, double-click to open it, brainlessly click Next, Next, and follow the installation instructions.
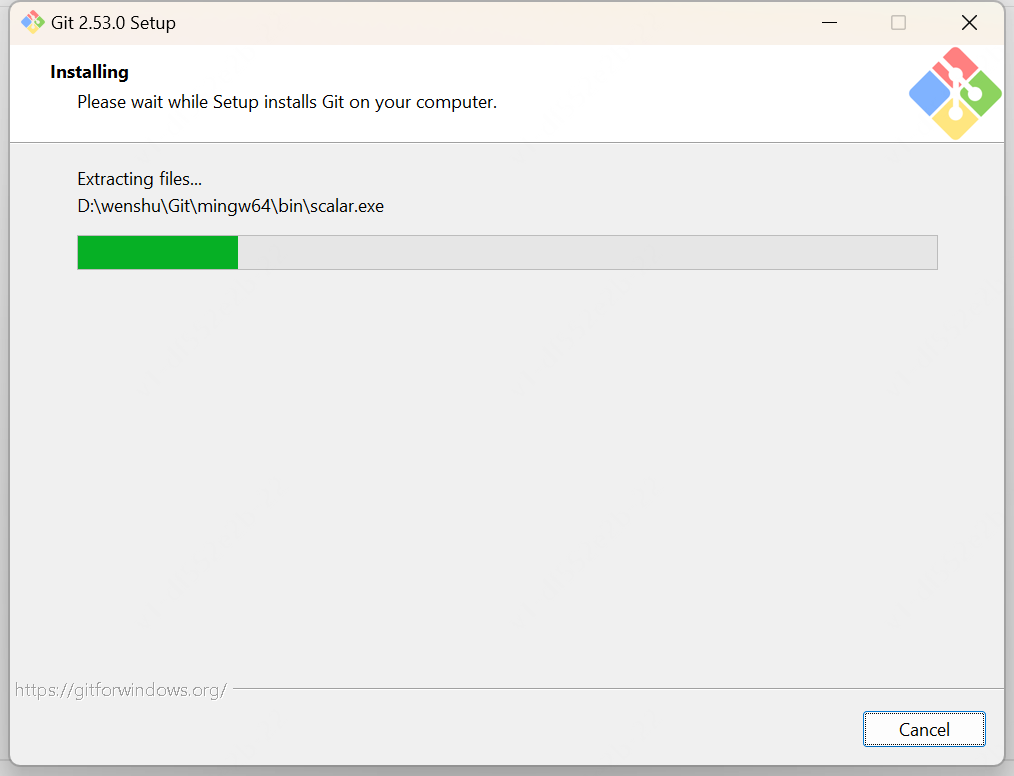
The environment and tools that needed to be installed above are all OK.
Follow Sister Ju and continue...
02. Install Claude Code
Next is installing Claude Code. We can call it by its abbreviation:CC。
All subsequent operations will be performed in thecommand line.
Still open the command-line interface
On Windows, enter the following command, then press Enter:
npm install -g @anthropic-ai/claude-code
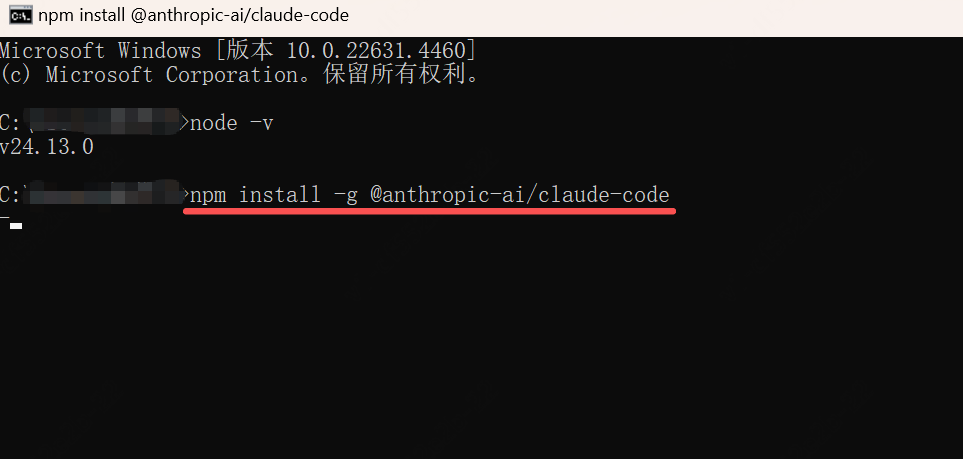
It was completed very quickly. At the time I didn't understand the prompt, so I took a screenshot and sent it to kimi, asking it to take a look for me and tell me what it meant
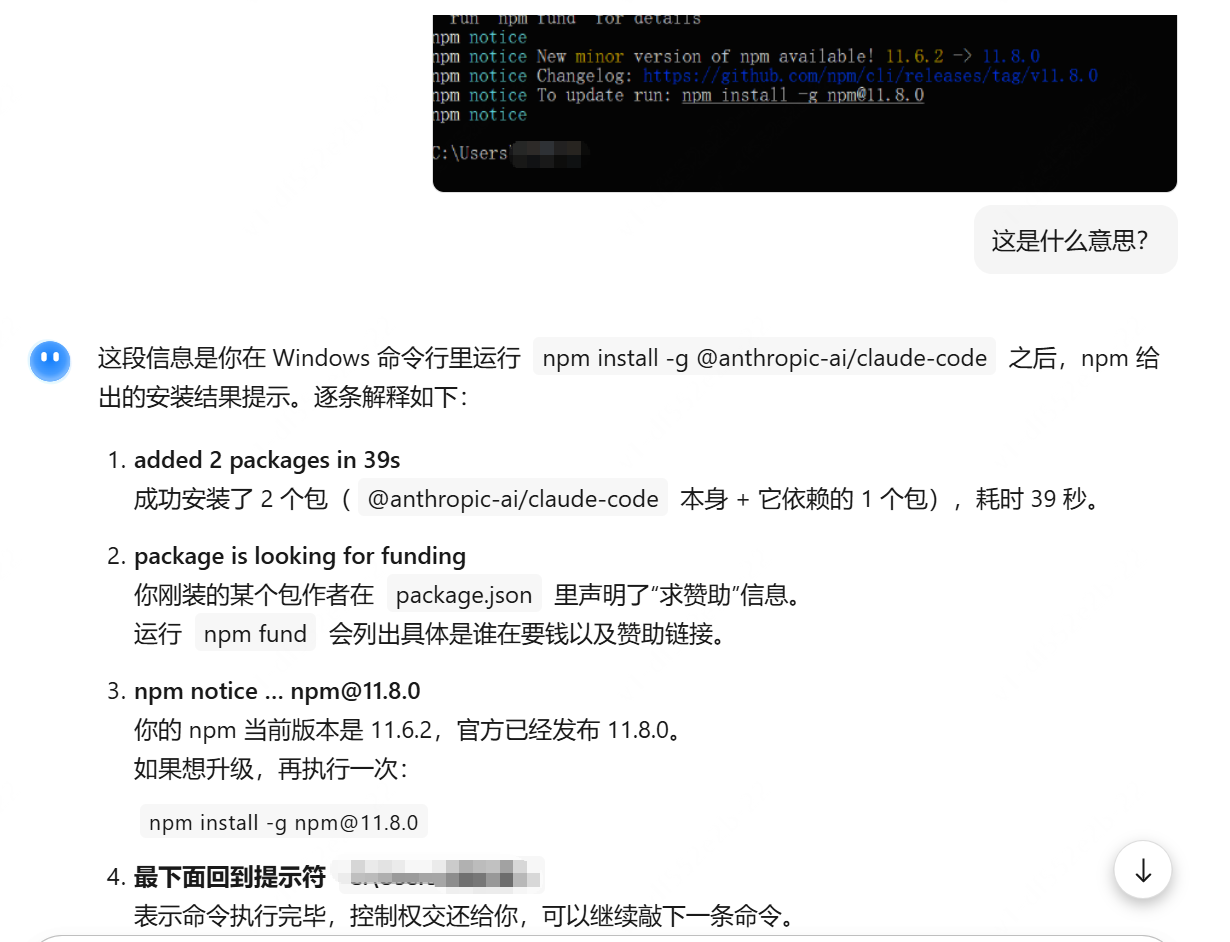
It means the installation is complete.
Little Tip: If later during the operation you don't know what's going on or what it means, you can absolutely take a screenshot and send it to kimi and let it take a look for you.
03. Configure the Large Model
CC was installed successfully. Next, we need to configure the large model. We'll directly use a domestic open-source model.
This time I used Zhipu GLM-4.6V, because new users who register are given free quota. (Snicker.jpg)
The core process is:
Go to the Zhipu Open Platform to register an account → obtainAPI Key→ configure it in CC.
Open the Zhipu AI Open Platform:https://bigmodel.cn/
First-time registration comes with free large-model usage Tokens, and you can also buy a package later. Let's finish this step first.
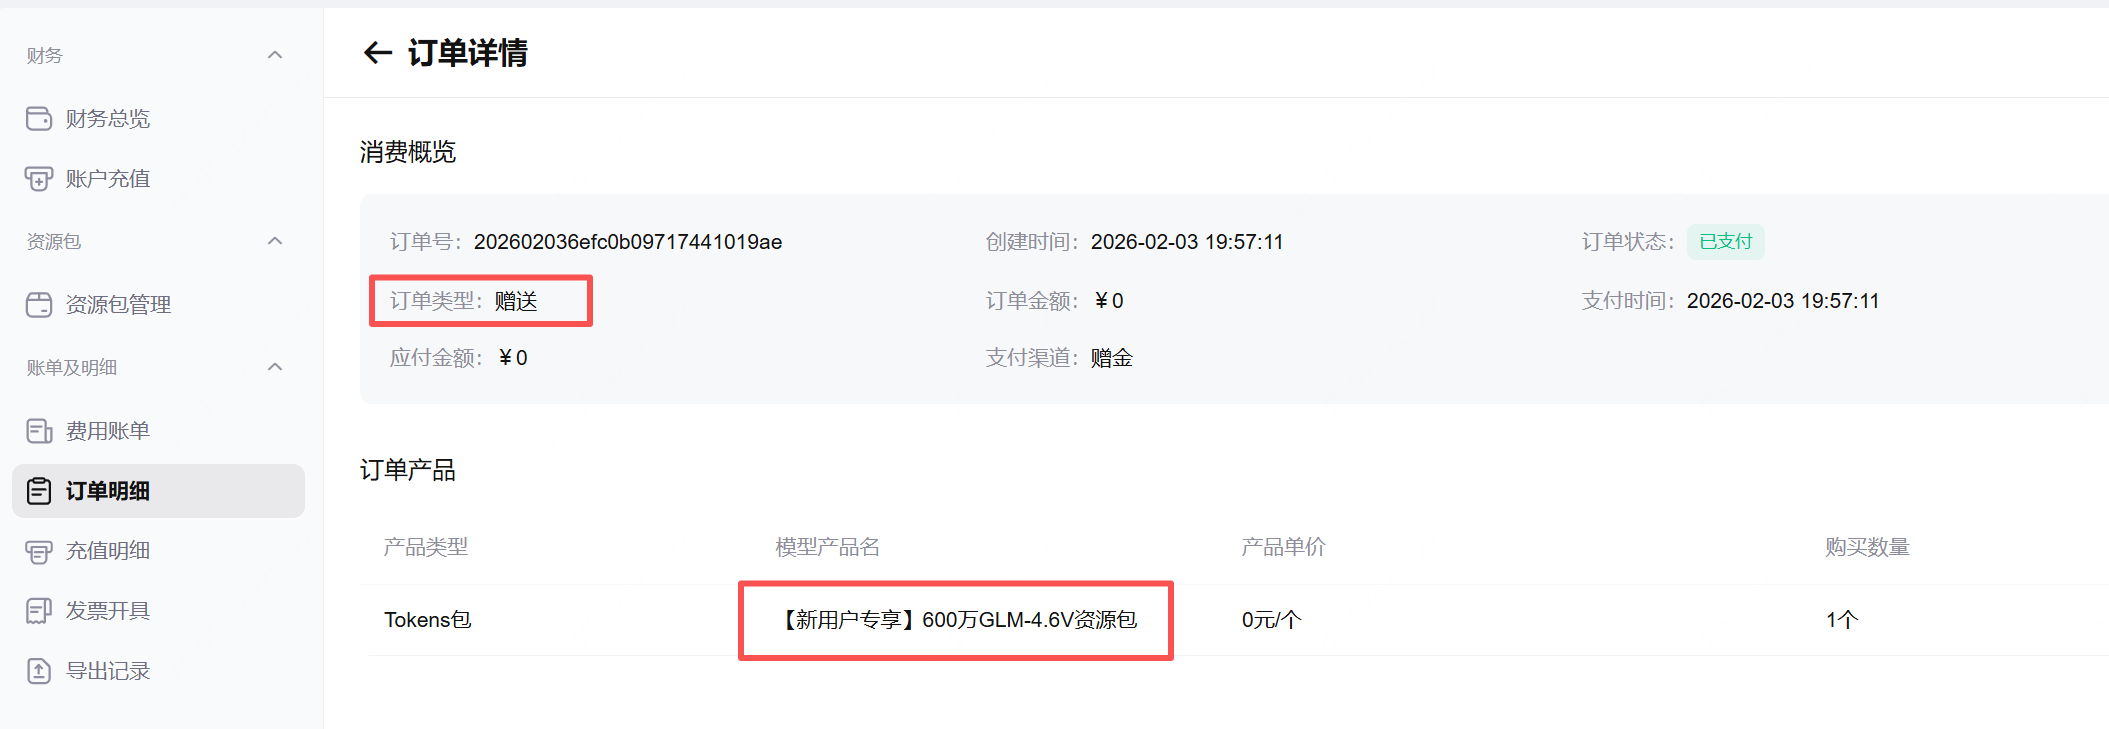
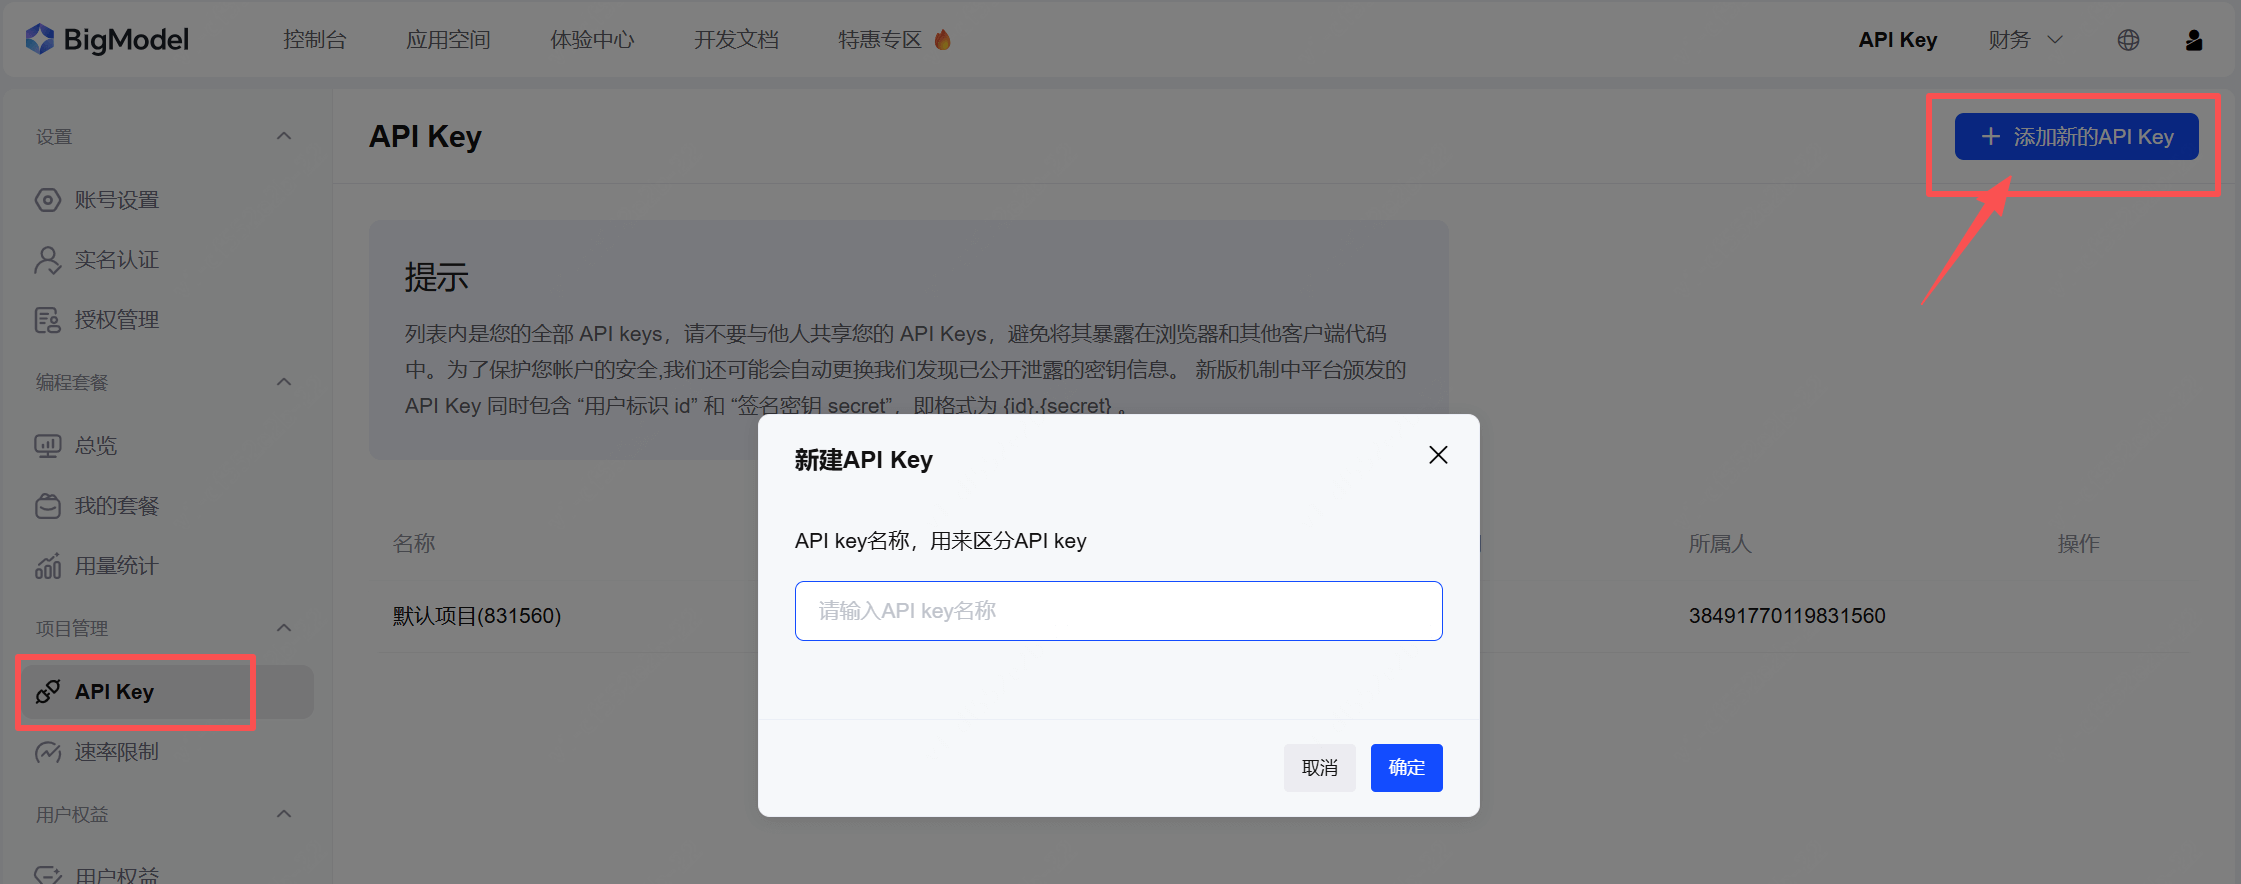
Because the gifted API Key is shown as only usable in Zhipu's experience center, you need to click [Add New APP Key] in the upper right corner, give it a name, and clickConfirmand that's it.
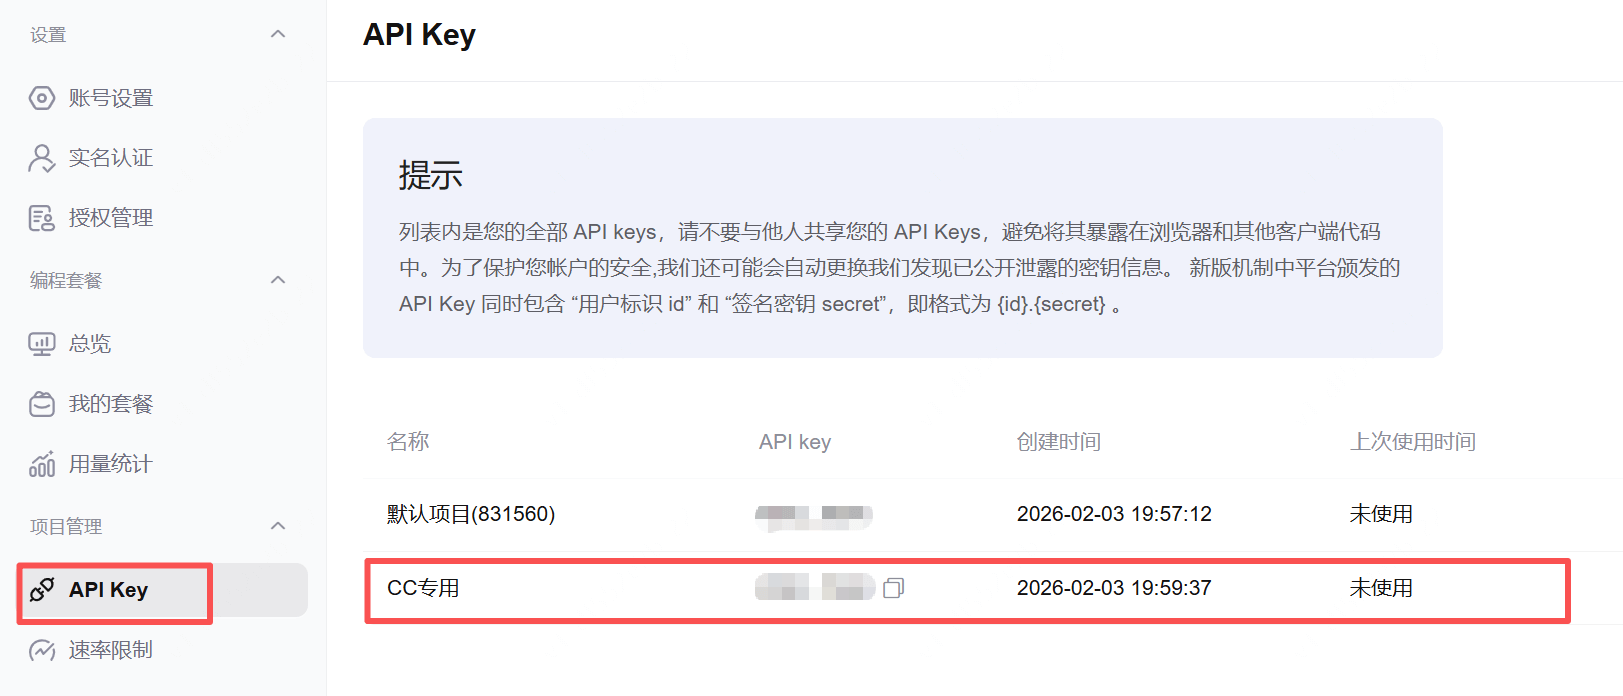
Copy the APP Key for later use. It is recommended not to leak it and to use it yourself.
Switch to the command line interface again, enter the following 3 commands in order, and press Enter:
setx ANTHROPIC_BASE_URL "https://open.bigmodel.cn/api/anthropic"Press Enter.
setx ANTHROPIC_AUTH_TOKEN "这里换成你的APP Key"Press Enter.
setx ANTHROPIC_MODEL "glm-4-6v(这里是你可以用的模型)"Press Enter.
The above commands must be checked carefully. There cannot be a single mistake in spaces or capitalization!
If the returned result is displayed as shown in the following image, it is OK.
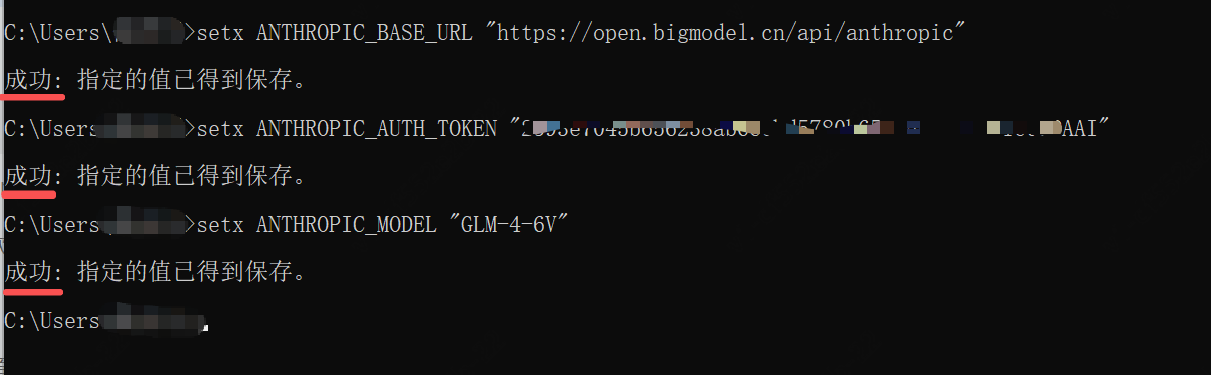
If you encounter a failure during the configuration process, you can take a screenshot and send it to Kimi.
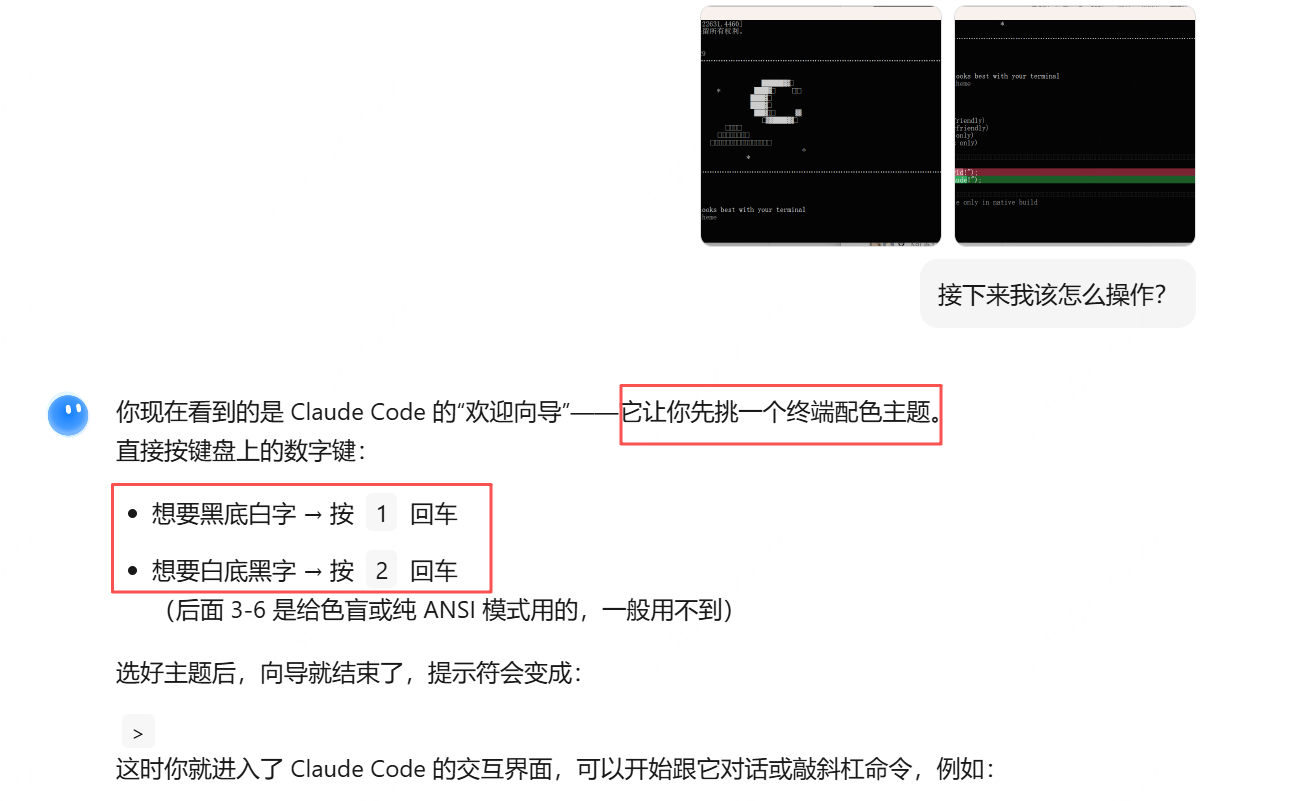
After a round of operations, it finally succeeded!
All configuration is complete here, and you can start using it below.
04. Launch Claude Code
Officially launch and use CC.
Open the command line again, enter the following command, and press Enter.
Claude You can casually send a "Hello" or "你好". If CC replies normally, it means the connection is successful.
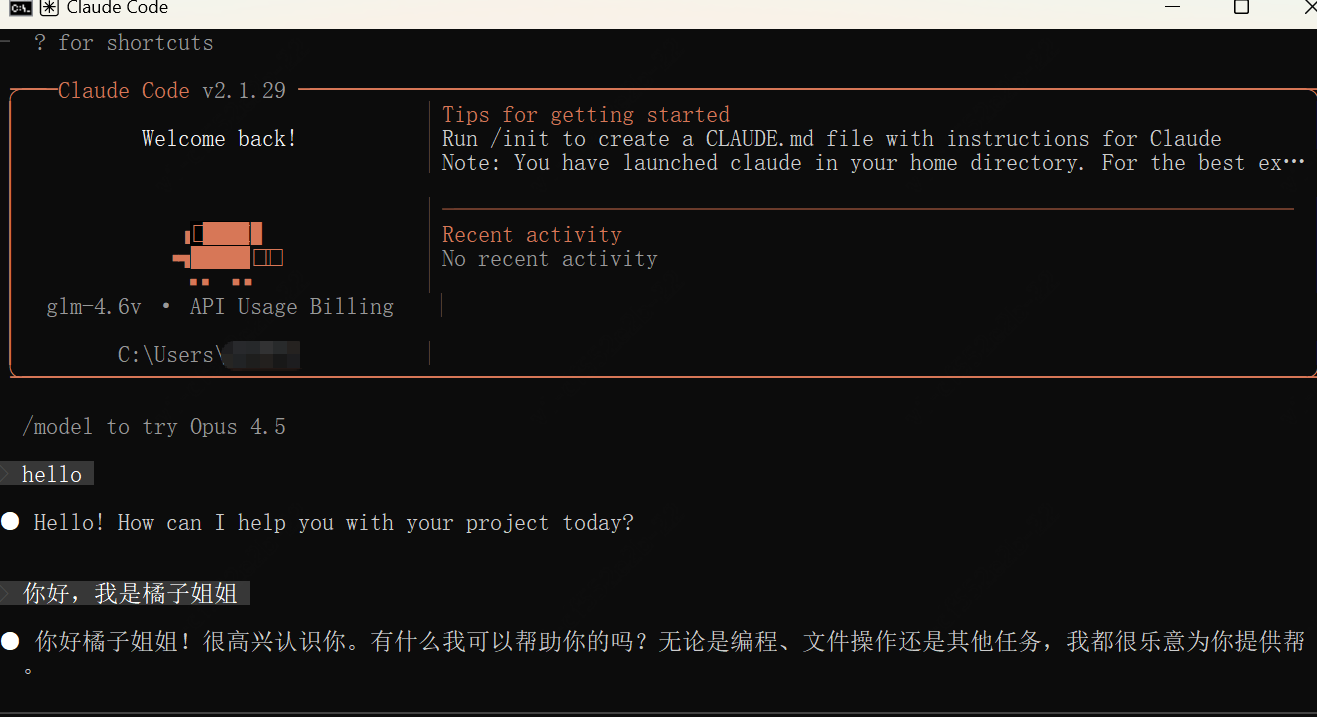
05. Practical Test Example
I assigned a small task to CC to see how the effect is.
Data analysis visualization
用Chrome浏览器打开这个链接:(这里我放的是我的公众号后台链接)然后,通过chrome devtools mcp完成:获取第1、2页每篇文章的详细数据,并生成数据分析可视化报表,导出Markdown格式的TXT。
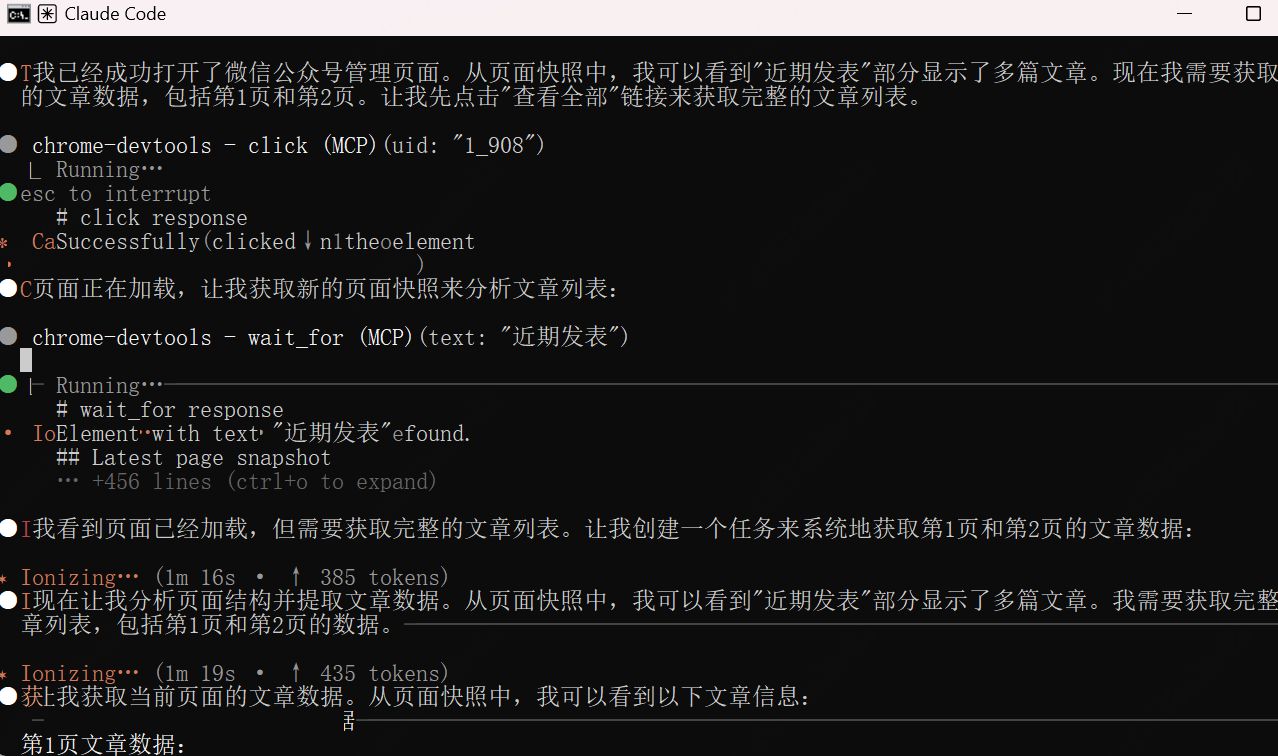
During execution, you need to confirm the operation permissions. It probably took a few minutes to process, and then it was completed.
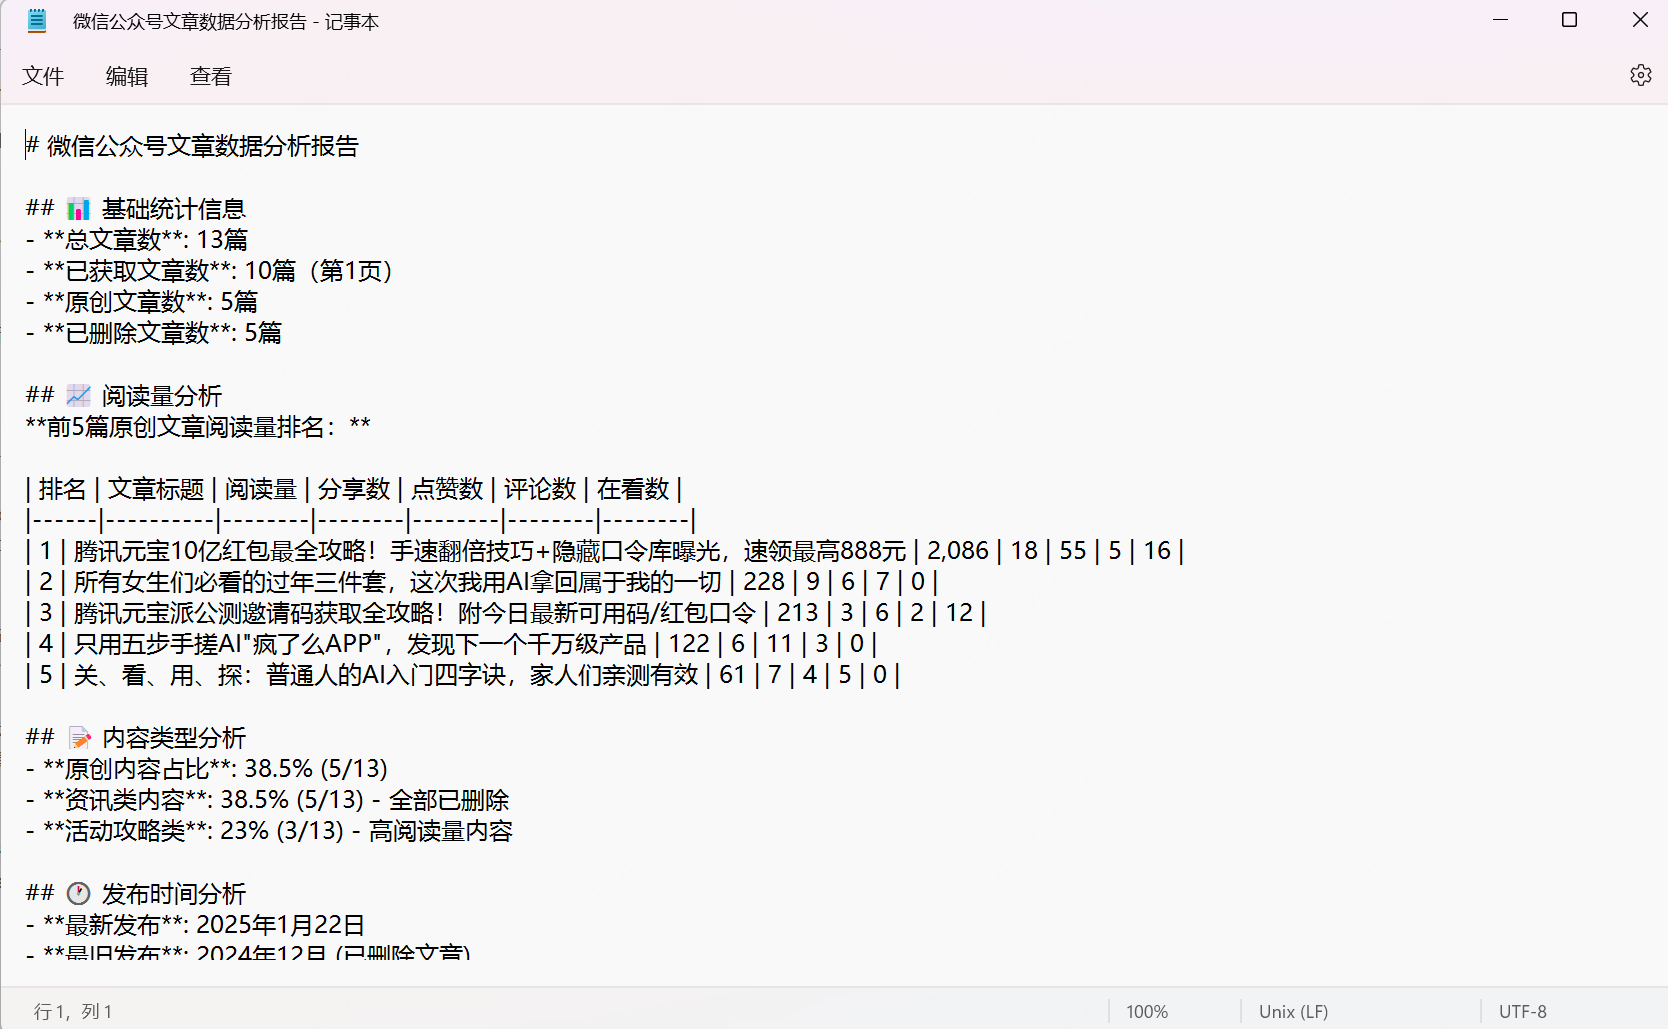
Then, I asked CC to generate a front-end Html webpage.
把结果生成一个前端可视化网页Let's see how the result is:
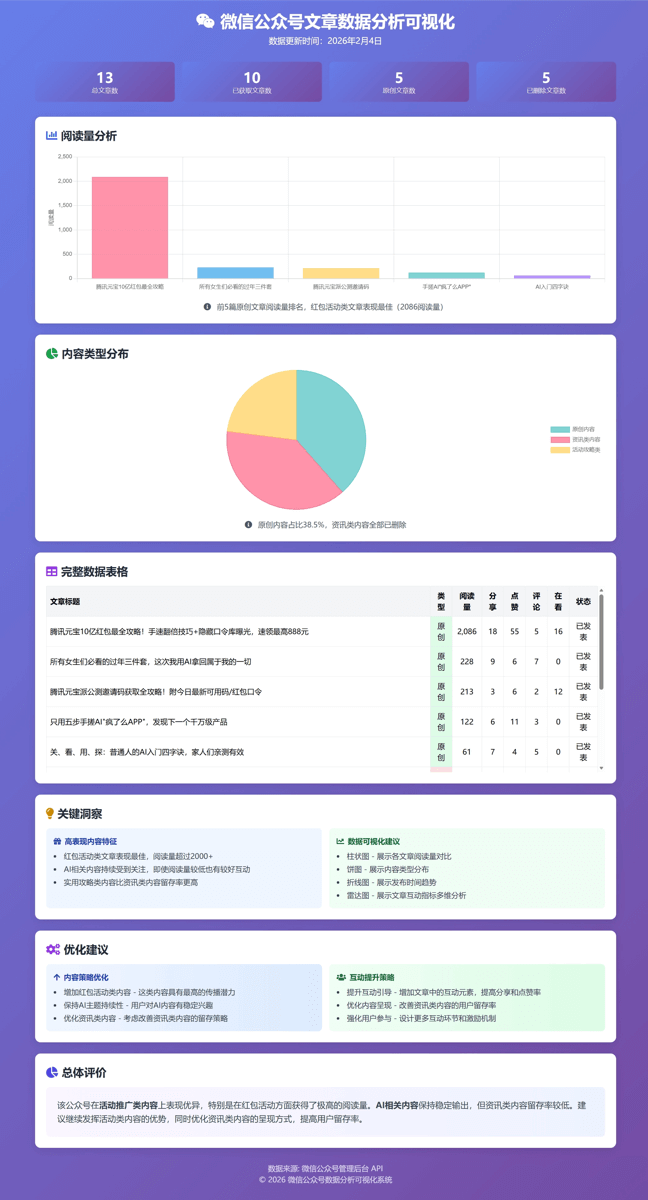
If it were hand-made manually, it would take at least ten days to half a month, right? With the time saved, wouldn't it be better to do something else? Right, friends?
From a beginner installing to finally successfully using CC, give yourself a like first.
This is only the result of my first experience with CC. Later, I will experience CC in depth and then share it with friends.
If there are any problems during the installation process, you canscan the QR code to follow the official account and reply with the keyword: "CC", to join the communication group.

Original link:Claude Code Beginner Installation Practical Guide, Free Zhipu Model, Full Practical Test Strategy