
Making emoji packs with AI is really awesome. Before, a set of emoji packs took several weeks to make, but now it can be done in minutes.
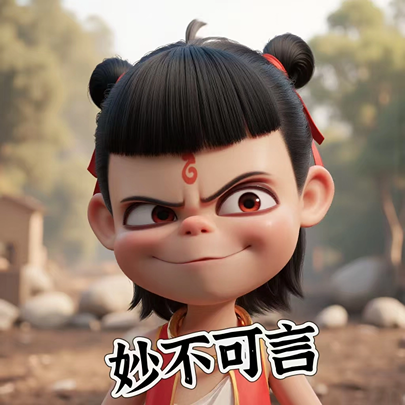
Next, I'll share with you the whole process of making the recently viral Nezha emoji pack with ComfyUI.
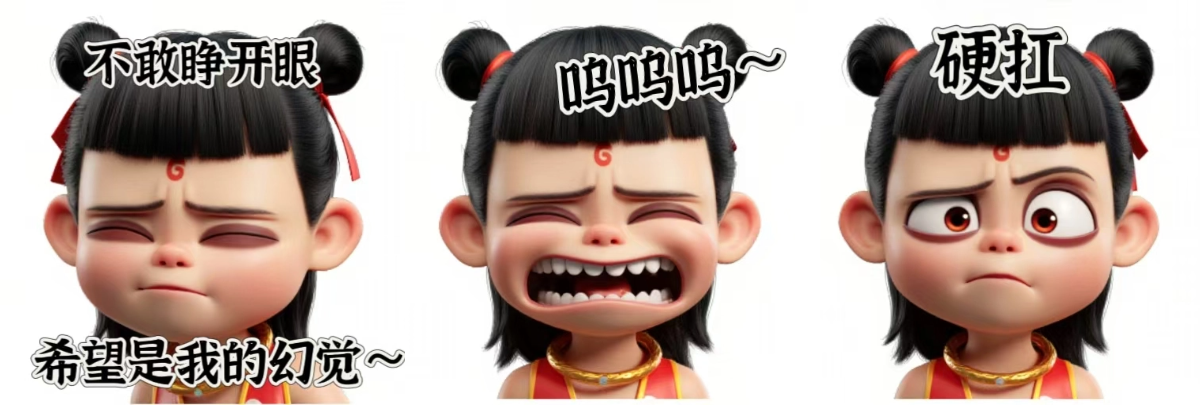

ComfyUI is good to use, but for friends with zero foundation, local installation and frequent errors when loading new workflow nodes each time are really headaches.
Recently I discovered that by directly using ComfyUI online workflows, you can make the same style with one click. On Tusi AI, thousands of models and loras can be used freely. This is so awesome!
01
Online Image Generation
Enter the Tusi AI homepage.
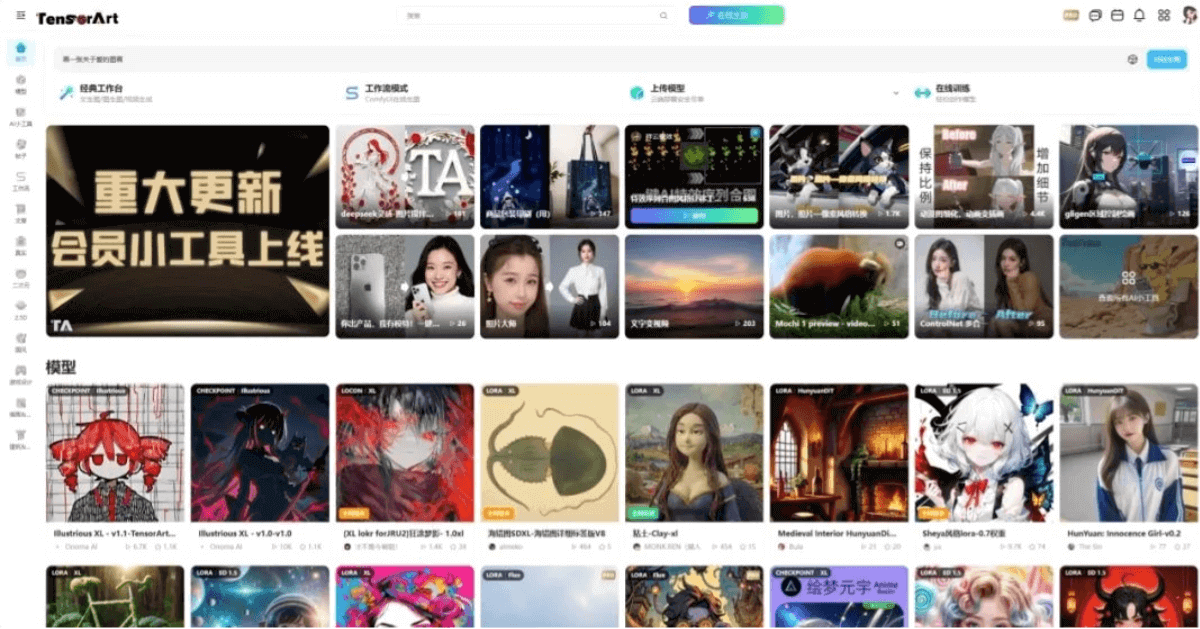
Search for [Nezha], and many related models, loras, and gadgets will appear. The Nezha in the cover of the 3rd item in the first row is drawn quite well. We directly click the image to view details.
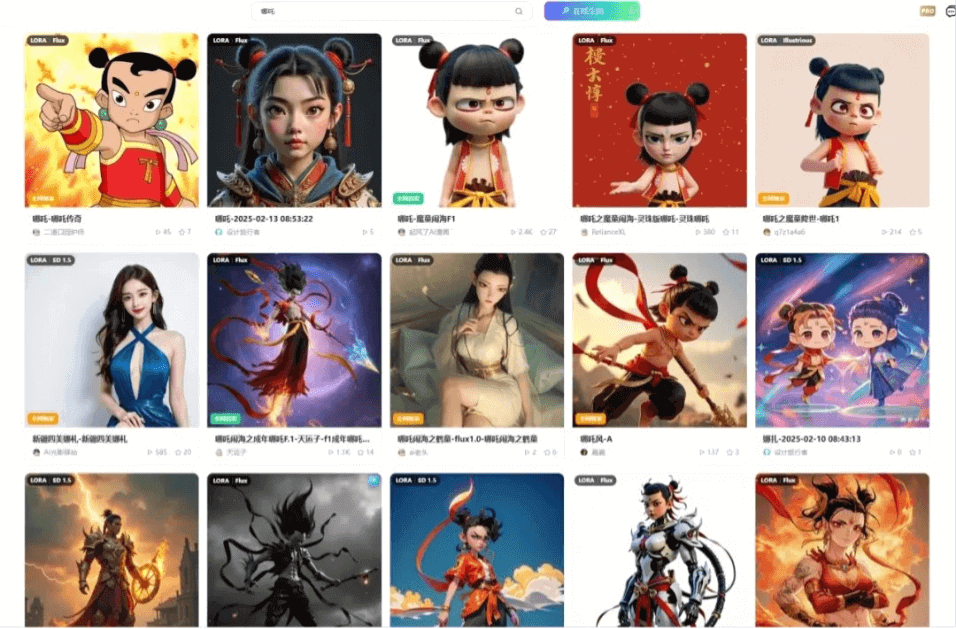
In the page information, we can learn that to generate the effect like the cover, you need the FLUX.1 model paired with this lora.
The trigger word for the lora is nz. Simply put, only when our prompt contains nz will the lora take effect and help us generate the desired Nezha image.
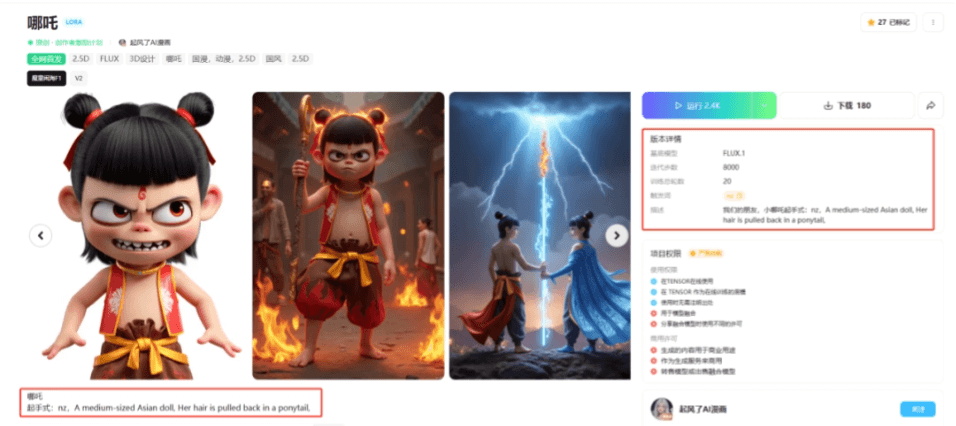
Click the example image, and we can see all the information for generating this image. You can click the one-click get same style in the lower right corner.
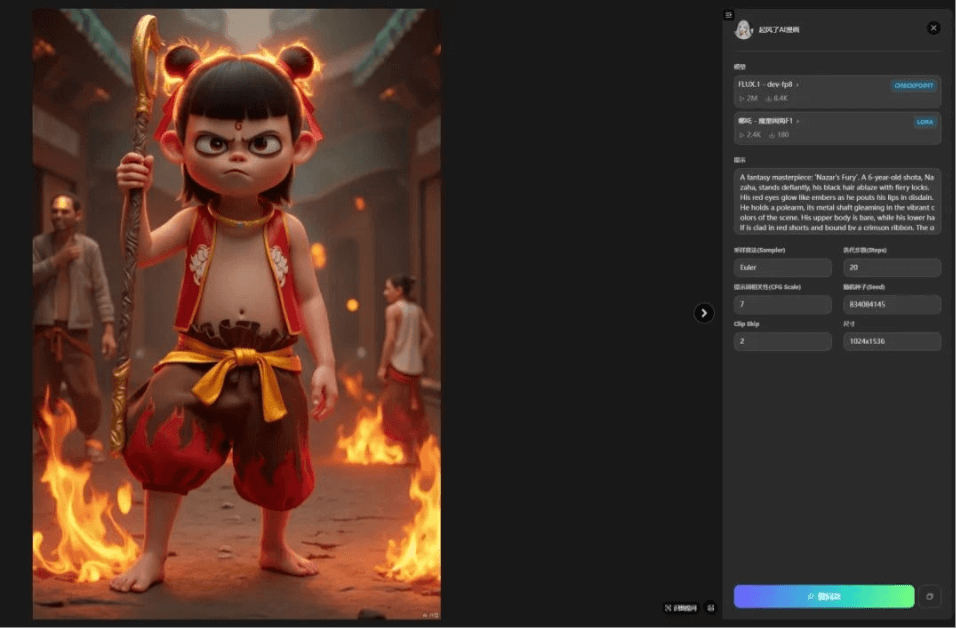
After clicking make same style, you arrive at an operation page similar to Stable Diffusion Web UI, and the prompt is automatically filled in for you. You can use the same parameters as the author with one click~
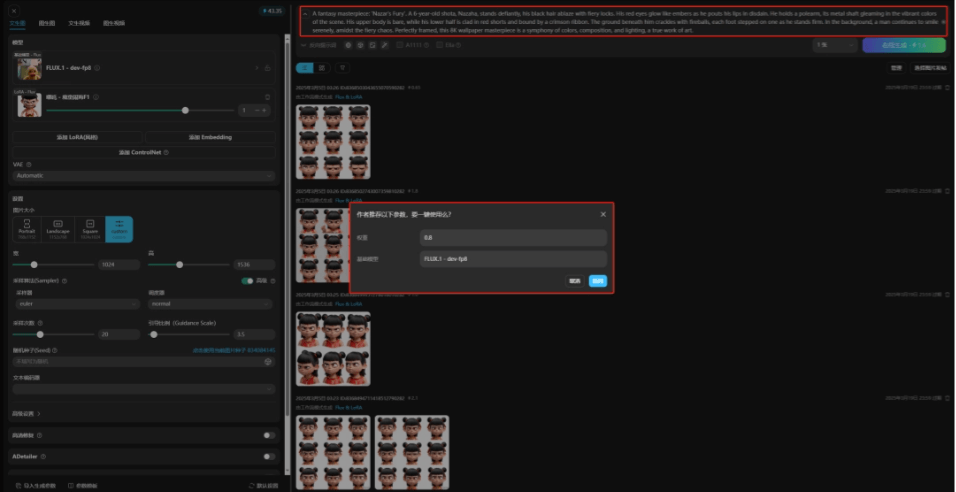
This way, you get the same Nezha as the cover.
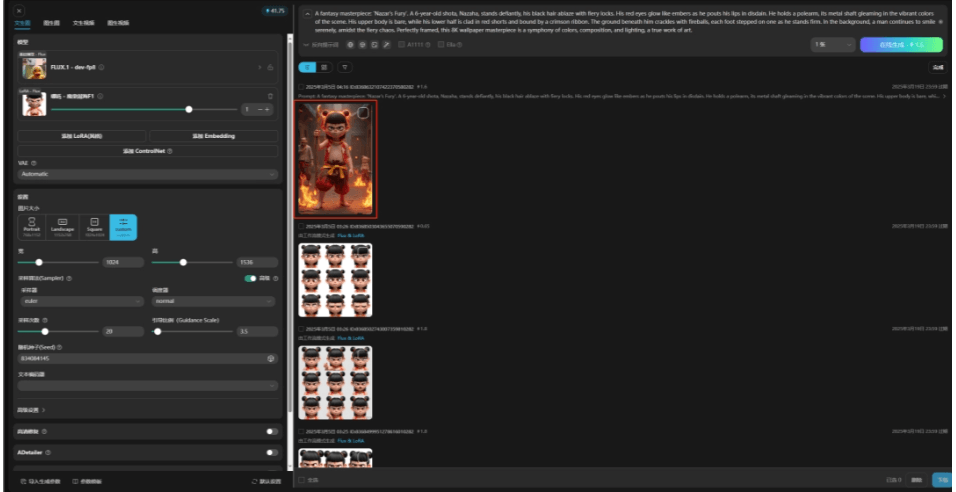
We can directly adjust the prompt to make images of Nezha in different actions and expressions~
02
Create Text-to-Image Workflow
Online workflows and online image generation have similar effects, but workflows are node-based. As long as it has been run once, if the parameters do not change, there is no need to set them every time, which is very suitable for batch image generation.
Next, let's create a basic text-to-image workflow together.
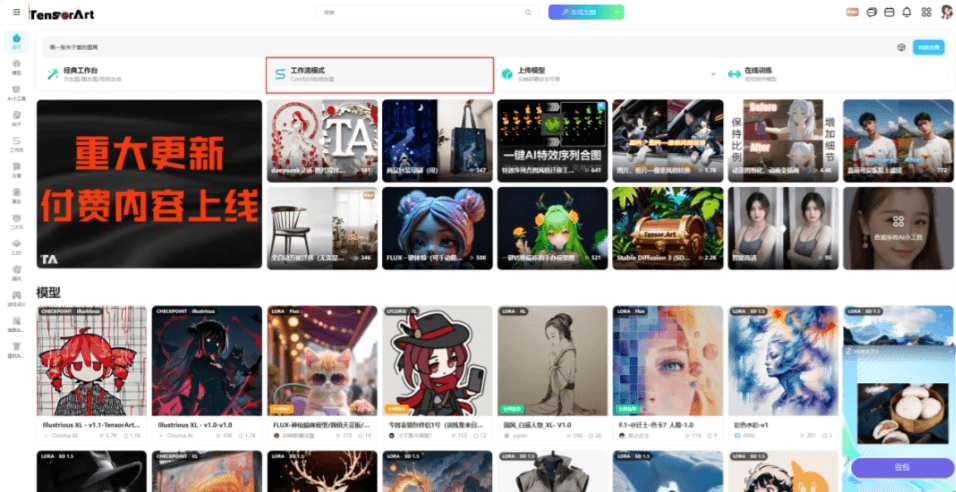
We click on the workflow mode on the homepage.
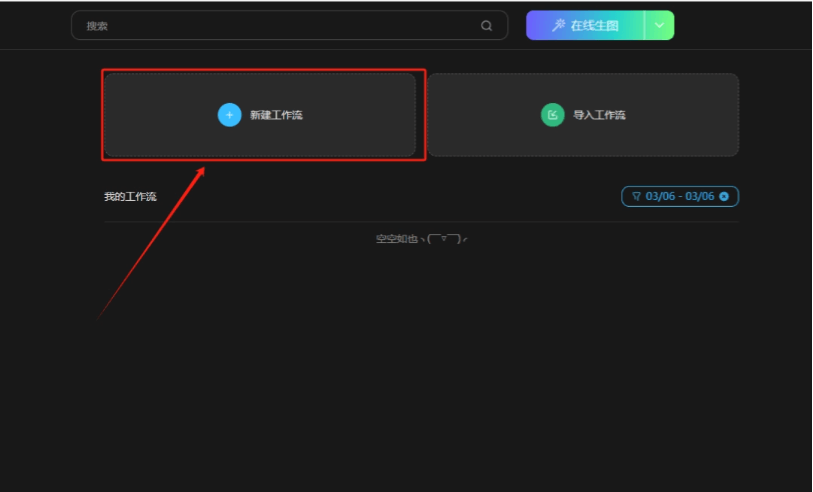
Click to create a new workflow.
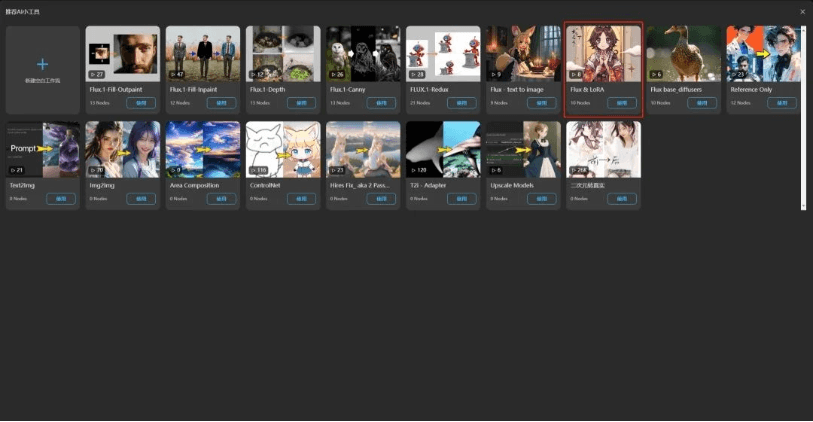
There are many basic workflow templates here. The Nezha image we just generated used the FLUX model and lora, so here we directly choose the FLUX&lora template.
Click use, and a basic text-to-image workflow is created.
The small modules on the canvas are nodes.
We can click on a blank area to drag the canvas, use the mouse wheel to control the canvas size, and hold the left button on a node to drag the node.
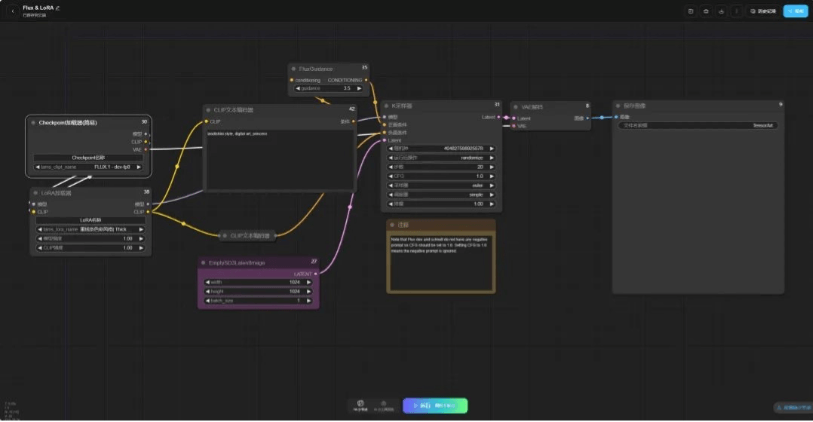
The colored small dots on the left and right sides of the node: the left side is the input node, and the right side is the output node.
They follow the rules of same color connection, left in right out, single in multiple out (a single input node can only connect at most 1 line; a single output node can connect multiple lines).
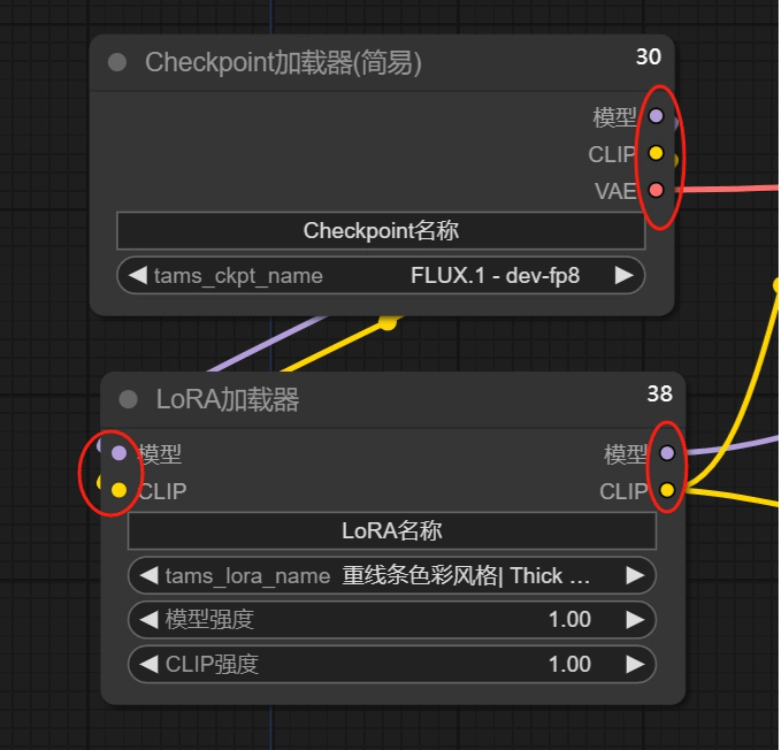
Let's try to reproduce the Nezha image drawn earlier.
Click the Checkpoint name.
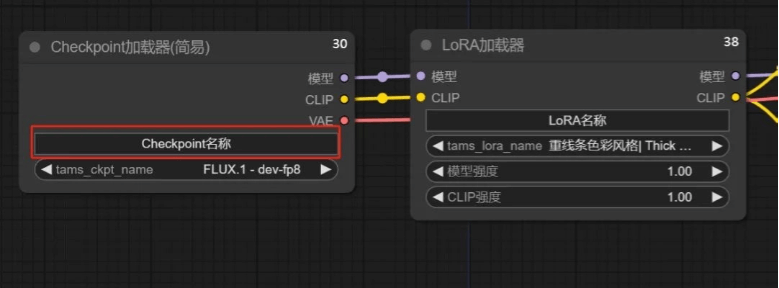
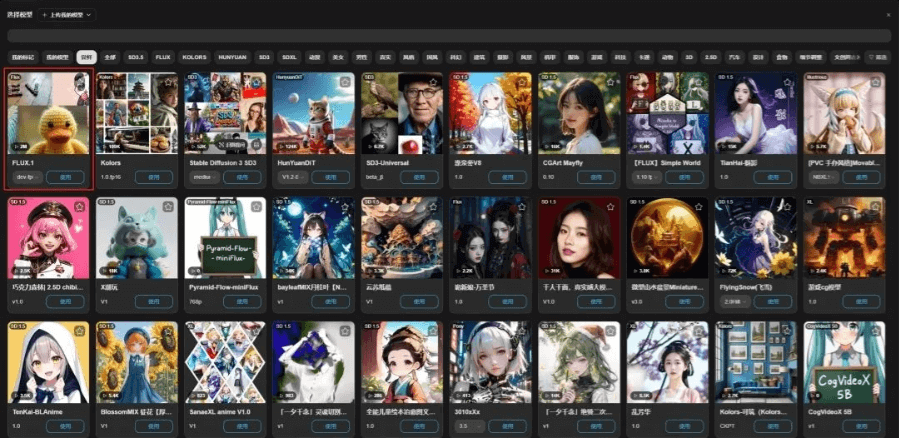
There are super many models available in the cloud. Here we choose the FLUX.1-dev-fp8 model and click use.
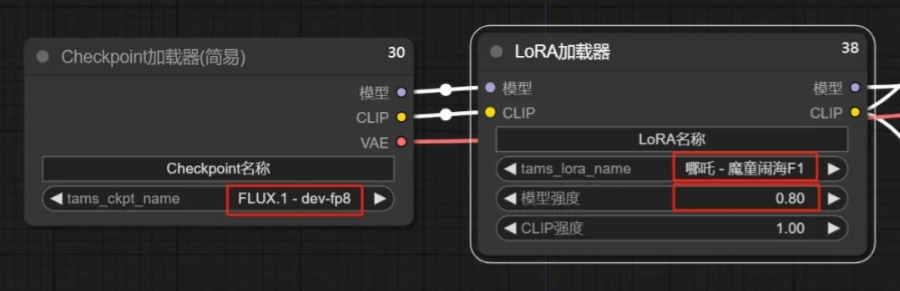
In the same way, we choose the Nezha - Demon Child Troubling the Sea F1 lora, and set the model strength (weight) to 0.8.
Enter the positive prompt:
A fantasy masterpiece: ‘Nazar’s Fury’. A 6-year-old shota, Nazaha, stands defiantly, his black hair ablaze with fiery locks. His red eyes glow like embers as he pouts his lips in disdain. He holds a polearm, its metal shaft gleaming in the vibrant colors of the scene. His upper body is bare, while his lower half is clad in red shorts and bound by a crimson ribbon. The ground beneath him crackles with fireballs, each foot stepped on one as he stands firm. In the background, a man continues to smile serenely, amidst the fiery chaos. Perfectly framed, this 8K wallpaper masterpiece is a symphony of colors, composition, and lighting, a true work of art.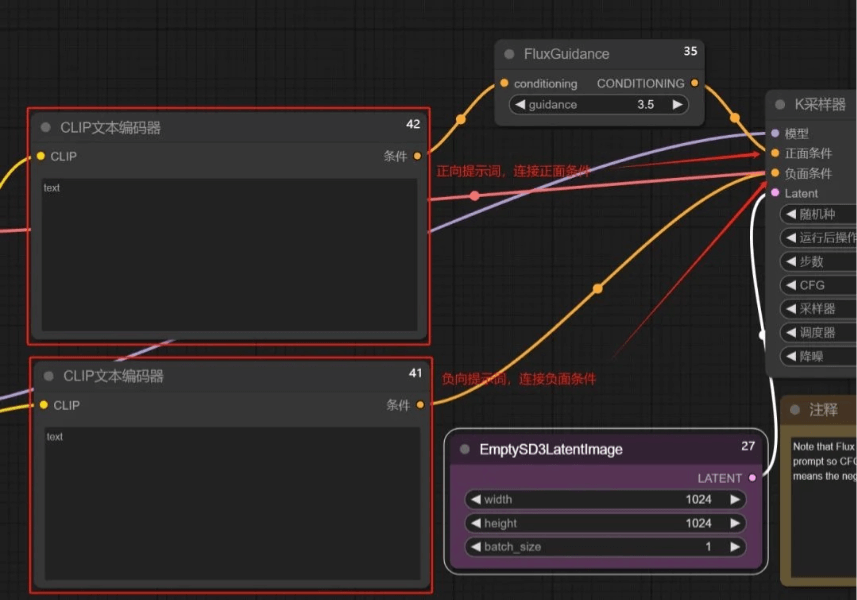
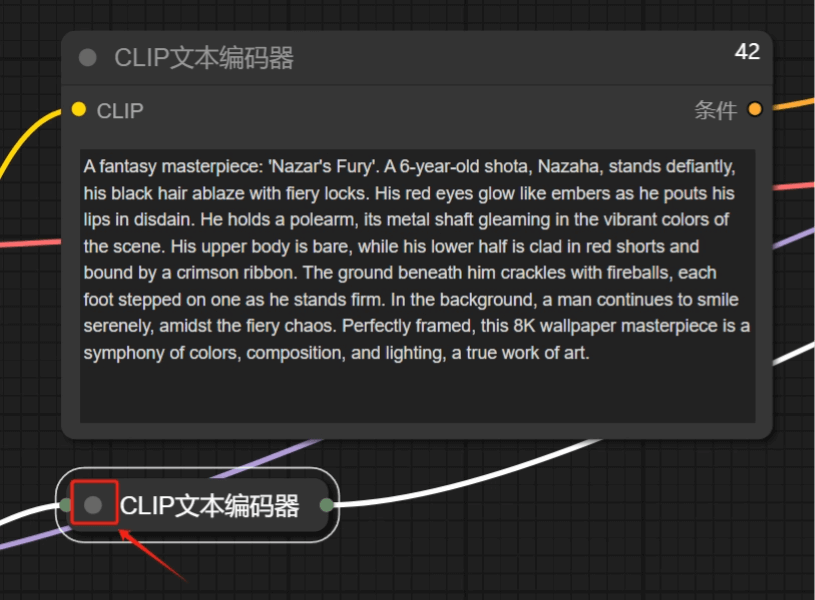
The Flux.1 model does not support negative prompts. We can click the gray dot in the upper left corner of the node to collapse it, making the interface cleaner.
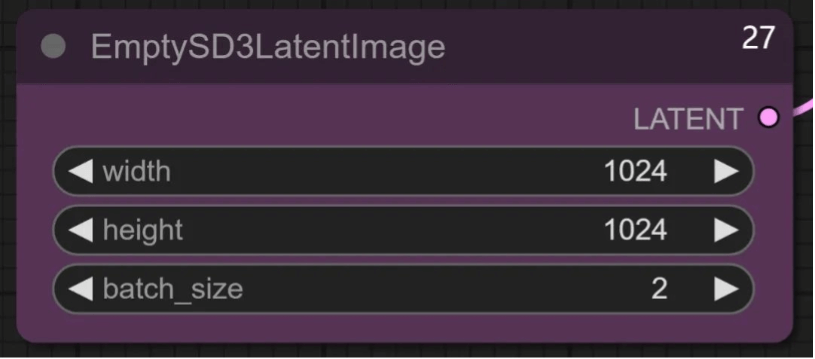
For the latent image, we adjust the size of the generated image and the number of images generated at one time here.
The parameters of the K sampler can refer to the settings for online image generation.
I want to replicate Nezha's example image, so here I fill in the random seed with the same 834084145 as the example.
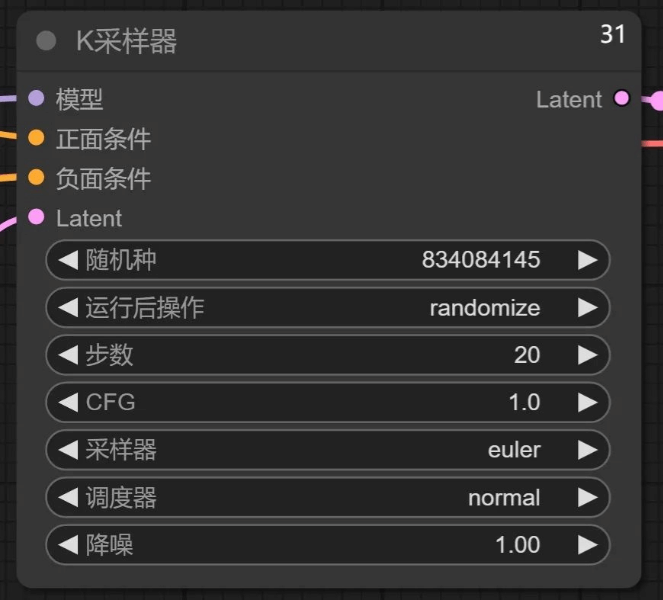
The other nodes can keep the default parameters; just click Run at the very bottom of the page.
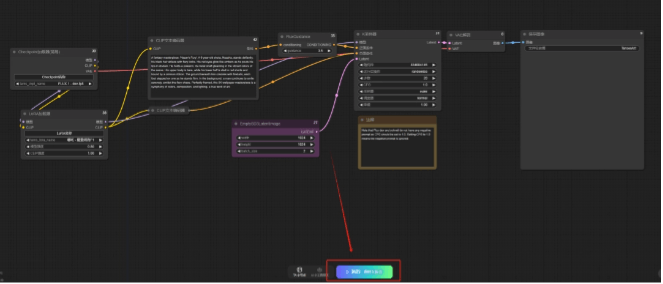
After waiting about 1 minute, 2 Nezha images will be generated.
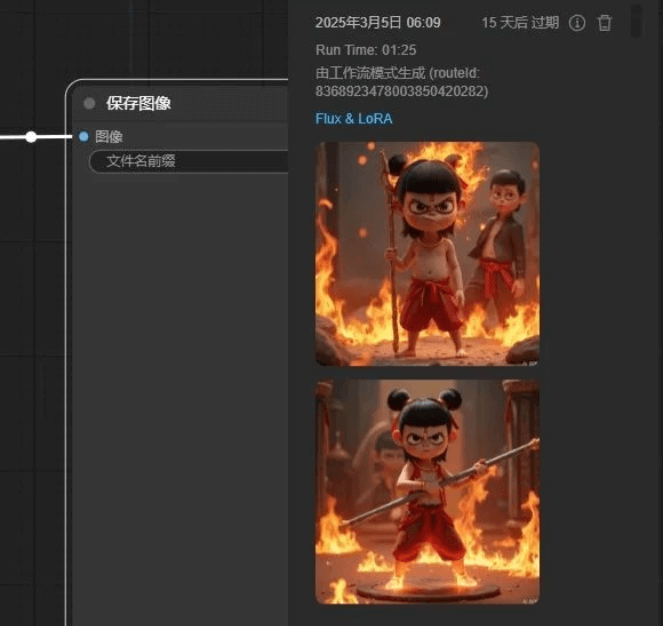
After that, you only need to gradually adjust the content related to expressions and actions in the prompt, and you can generate various expression packs with a consistent image~
I also tried generating a four-panel expression pack, and the effect was pretty good too. Positive prompt: nz, A medium – sized Asian doll, her hair neatly pulled back in a ponytail, with the entire head and hair fully within the frame, presented in a clear 2×2 grid, each cell featuring a distinct expression of the same Nezha character. High – resolution, with vivid and sharp digital painting details.Top row:First face: Nezha with eyes gently closed, head slightly tilted back, a contented smile on the lips, showing a look of pure enjoyment, as if savoring a delicious treat or a wonderful melody.Second face: Nezha’s eyes are wide open, almost popping out, with a look of shock and curiosity, eyebrows raised high, as if suddenly seeing something extremely astonishing.Bottom row:First face: Nezha is crying, with big, fat tears rolling down the cheeks, eyes red and puffy, mouth quivering, looking extremely sad and heartbroken.Second face: Nezha wearing a warm, friendly smile, with eyes slightly curved, exuding a sense of kindness and approachability, the corners of the mouth turned up gently.Nezha is dressed in his classic, eye – catching red and yellow outfit, adorned with a vibrant red headband, his arms and legs exposed, and a prominent small red mark on his forehead.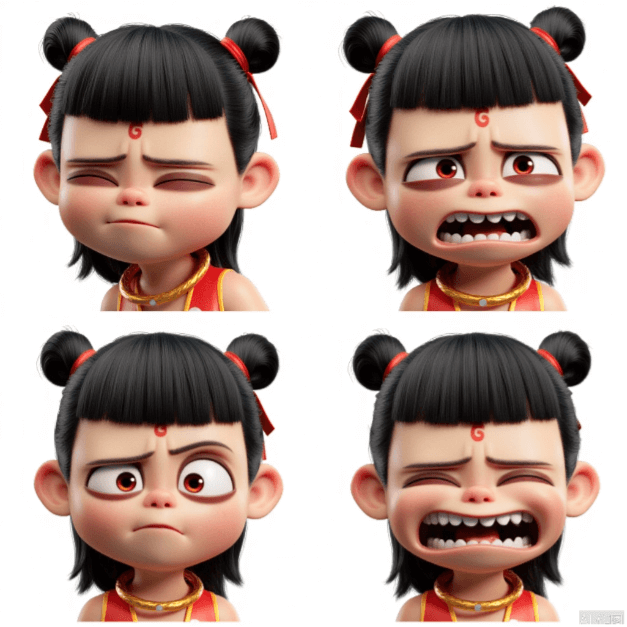
03
ComfyUI High-Definition Restoration Workflow
The generated images look okay, but the clarity still doesn't feel quite good enough, so I built high-definition restoration nodes into the workflow.
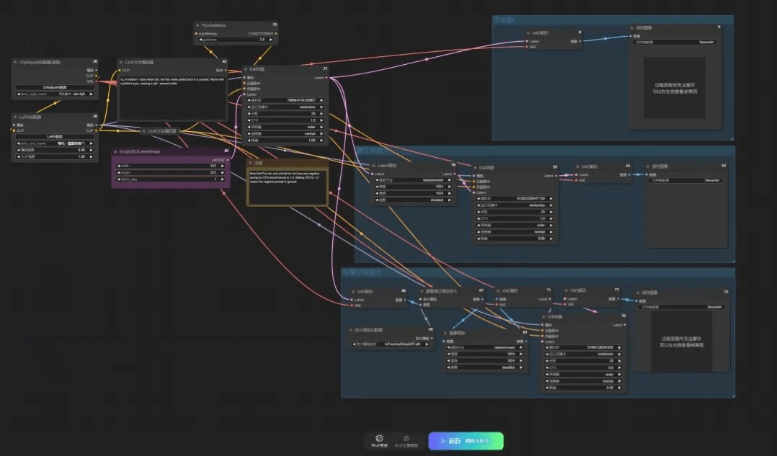
In the high-definition restoration nodes, the K sampler can just stay consistent with the one in text-to-image~ You can adjust the final effect by adjusting the denoising value; a setting between 0.5-1 is recommended.
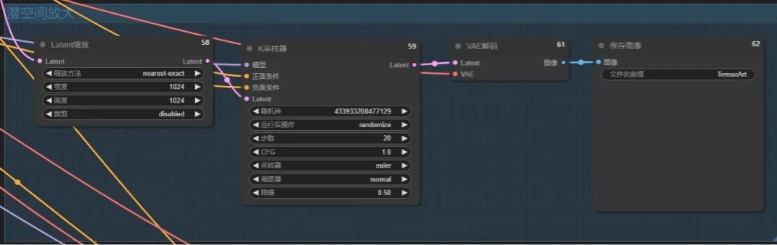
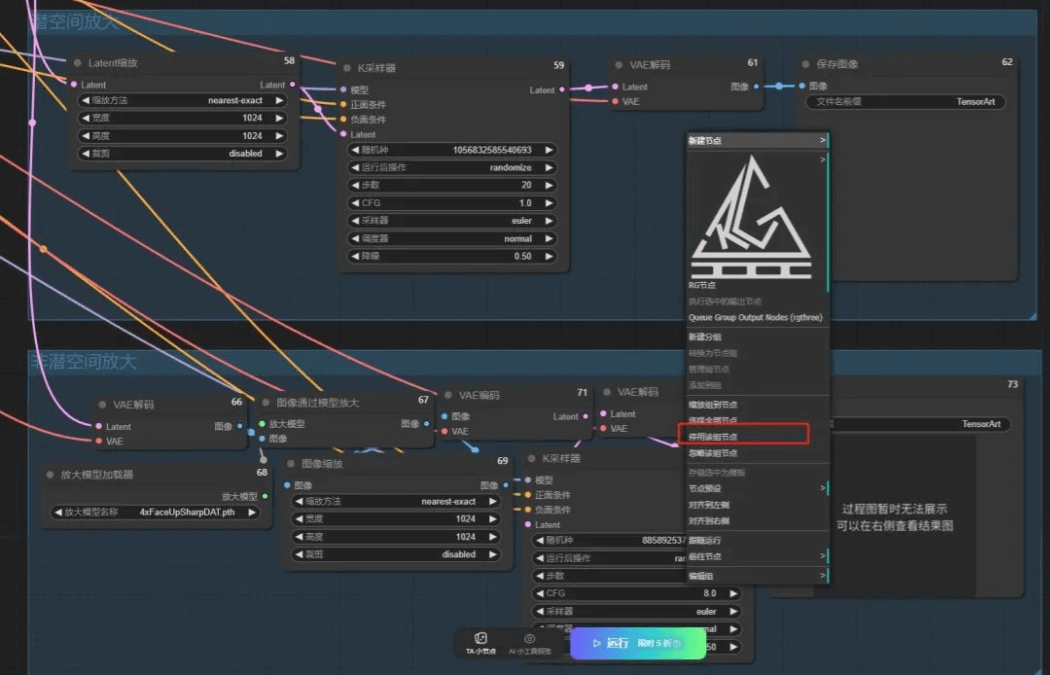
In the non-latent upscale group node, you also need to choose an appropriate upscale model.
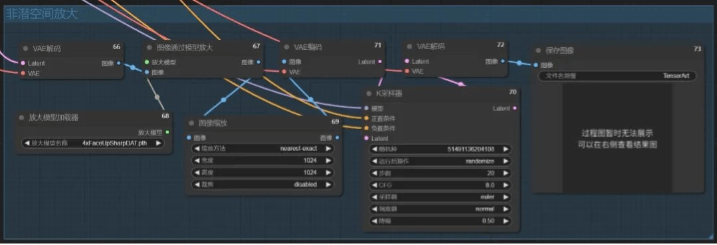
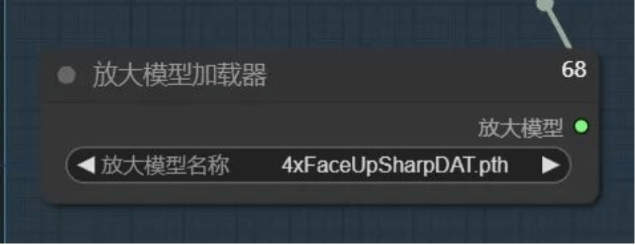
When we generate character expression packs, we mainly need some facial restoration, so here the upscale model is chosen as 4xFaceUpSharpDAT.pth.
We click Run, and at this point the workflow will generate 3 images, namely the text-to-image image and the images upscaled in 2 ways.
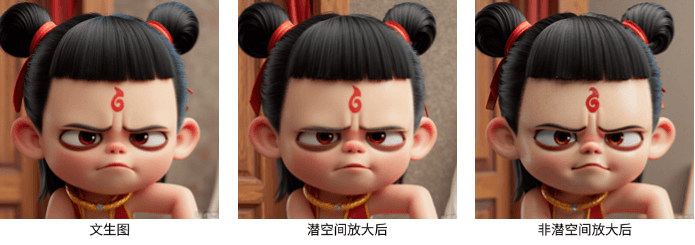
Comparing the 3 images, the image upscaled using non-latent upscaling is the clearest. We can right-click in the other two groups, disable the group nodes, and keep only the one with the best effect to run~ This can save some compute.
Click Publish in the upper right corner of the page to upload the workflow to Toast and share it with friends.
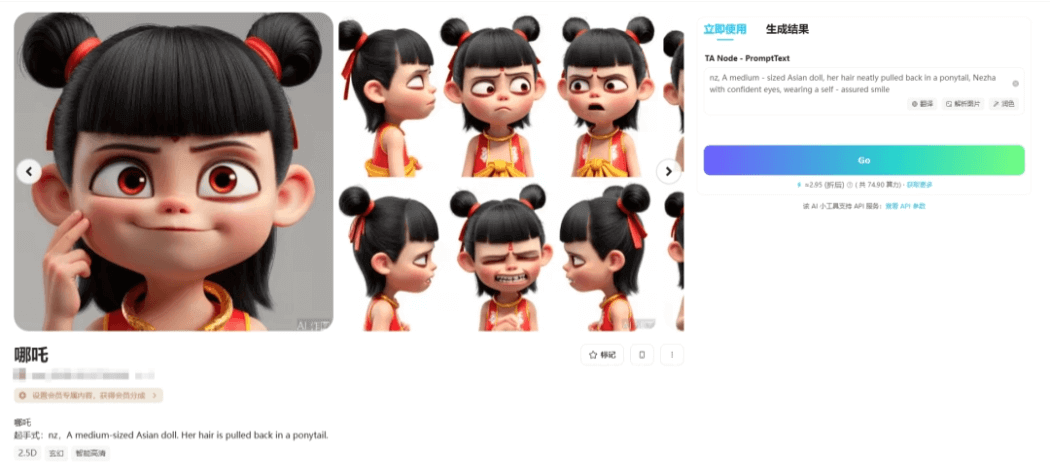
Everyone can click the link below to use the same mini tool~
https://tusiart.com/template/run/836929649576720604
04
AI-Generated Video
Earlier we have already generated various expression images of Nezha. Next, we will turn these images into videos separately.
We open Zhipu Qingying and choose image-to-video.
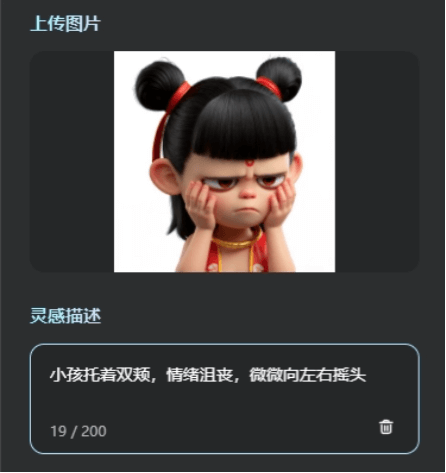
Upload the image we just made, and then briefly describe the dynamic effect you want.
Prompt: The child holds both cheeks, feeling depressed, and slightly shakes the head left and right
05
Add Text
Convert the Video into an Animated Expression Pack
Open CapCut, upload the completed video, and add subtitles.
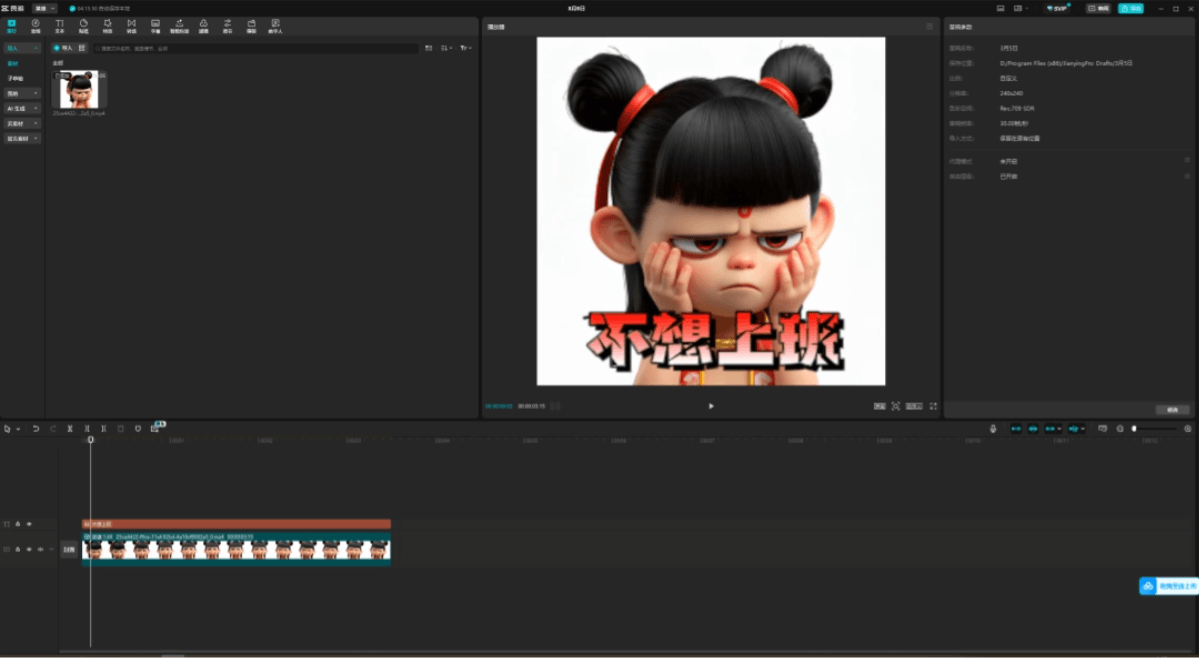
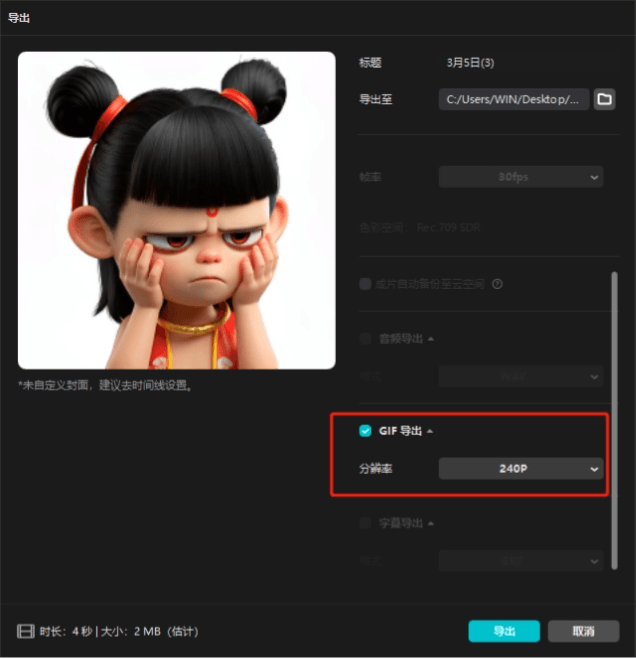
When exporting, choose GIF export, with a resolution of 240P.
Having said so much, these are still just a little bit of the surface of using ComfyUI workflows, but if you can master these, you will be able to smoothly use all kinds of excellent workflows on the platform.
As for a more refined understanding of ComfyUI, everyone needs to gradually learn and understand it through their own usage. I hope this tutorial can make you feel that using ComfyUI workflows is not an unattainable difficult task; you only need to learn a little bit to use it efficiently.
All tools involved in this article:
Toast AI:https://ai-bot.cn/tusiart/
Zhipu Qingying:https://ai-bot.cn/qingying/
Original link:ComfyUI spoon-feeding tutorial: Teach you to make Nezha emoticons with AI in 3 minutes